Installing MIMIC-III in a local Postgres database on Windows
These are relatively brief instructions provided to ease installation of PostgreSQL with MIMIC on a Windows machine. If you feel there are key details missing, please raise an issue with your suggested improvements - we would love to incorporate them!
Note that before proceeding with this guide you will need to:
- Download the MIMIC-III Clinical Database (see here for details on gaining access).
- Extract the MIMIC-III Clinical Database as .csv files somewhere on your local computer.
- Download the PostgreSQL scripts from here - only the files which end in
.sqlare required.
Install PostgreSQL
Install PostgreSQL using the installer linked to here: http://www.postgresql.org/download/windows/
Any version above PostgreSQL v11 should work with instructions and the code written in the (mimic-code repository. Earlier versions may also work but with mixed success.
Run through the entire install process. Keeping the defaults will work, but make note of your postgres password, as we will need this later to login to the database system. For convenience, one option is to keep the default username “postgres” and use the password “postgres”.
(Optional) Install a command line program to extract compressed files
It is convenient to install MIMIC directly from the compressed files, as they take up a large amount of space uncompressed. One method of doing this is to install a command line program which can extract compressed files. Once this program is installed, we can incorporate this program directly into the load process of PostgreSQL tables. If you would like to, you can skip this step by decompressing your files to a folder now (though note this will take some time and around 40-50 GB of space).
If you choose to load from compressed files directly, there are two programs which you could use: 7-zip or GNU gzip. 7-zip is a GNU LGPL licensed utility with good Windows integration. GNU gzip is a GPL licensed program which will be very familiar to GNU/Linux users. Once you have made your choice, install one of these utilities as follows.
If you are installing 7-zip:
- Go to ( http://www.7-zip.org )
- Click the appropriate download link at the top (you are likely using 64-bit Windows, but you can check in Control Panel -> System)
- Run through the installer (all the defaults will work)
- If you changed the install path, then note it down. Otherwise, your executable path will be
C:\Program Files\7-zip
If you are installing gzip:
- Go to http://gnuwin32.sourceforge.net/packages/gzip.htm
- Next to “Complete package, except sources”, click the “Setup” button to download the installer
- Run through the installer (keeping all the defaults)
- If you changed the install path, then note it down. Otherwise, your executable path will be
C:\Program Files (x86)\GnuWin32\bin
You may ask “What is an executable path?”. Essentially, while we now have the program on our computer, Windows doesn’t know where to look for it. Normally this doesn’t matter, because we run the program from the file by double clicking it. However, for the load process, we need Windows to know where to look. We can do this by adding the folder to the environment PATH variable.
This process is the same for both 7-zip and gzip, though as mentioned, the executable path that we are adding will differ.
- Click the start menu, right click Computer, and click Properties
- (if you are on Windows 10, this may be different).
- Click
Advanced System Settings - Click
Environment Variables... - In the bottom box, scroll down until you see
Path. ClickPath, then clickEdit... - In the
Variable value:box, add the path name to the end- The default for 7-zip is
C:\Program Files\7-zip - The default for gzip is
C:\Program Files (x86)\GnuWin32\bin
- The default for 7-zip is
- Click
OKon all the open windows.
Windows should now know where to look when extracting the data - of course, it’s sensible test it that this works before doing the load! Click the start menu, and type cmd, then run the program cmd.
- If you installed 7-zip, type:
7z - If you installed gzip, type:
gzip --version
This command should give you a bunch of information. If instead it says something like 7z is not recognized ... or gzip is not recognized ... then there is a mistake in your install: likely a typo in your path text.
Run SQL Shell (psql)
Launch the program “SQL shell”. You should be able to find it in your start menu.
You will receive many prompts for input at the SQL shell: you can simply hit “enter” without typing anything to insert the default for all these fields except the password: you will need to type in the password you specified during the install.
The rest of the commands in this section should be run in the SQL shell.
Overview of the database structure
PostgreSQL stores data with the following hierarchy:
- A database with many schemas
- A schema with many tables
- A table with many columns and rows
For MIMIC-III, we store all data in the same database named mimic. By convention, MIMIC-III data is loaded into the mimiciii schema, which contains many tables (~20) for querying. It’s important to keep these layers in mind as it’s common for people to think they have no data installed, when in reality they are looking in the wrong schema! We’ll now go through creating these layers one by one.
Create the database to hold the data
Run the following commands:
DROP DATABASE IF EXISTS mimic;
CREATE DATABASE mimic OWNER postgres;
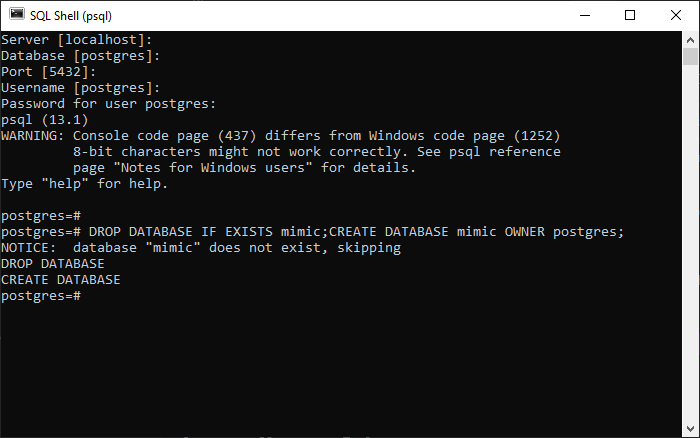
If this is the first time you are installing MIMIC, the “DROP DATABASE” command will warn you that no database existed - this is expected behaviour.
This creates the database mimic, owned by user postgres. Of course you are welcome to change these values if you like - just note that any changes here will require further changes in the subsequent steps.
Next, connect to the mimic database.
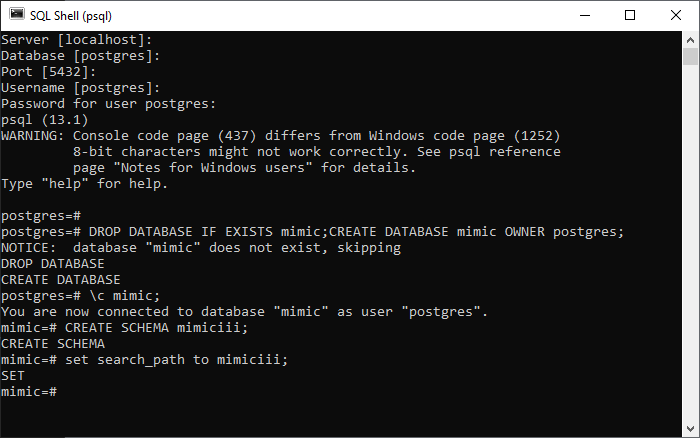
\c mimic;
Create the schema to hold the database
Note that postgres uses the public schema by default. While it is personal preference, we recommend creating an independent schema to host the data. To do this, create the mimiciii schema:
CREATE SCHEMA mimiciii;
Then, inform postgres that it should by default use the mimiciii schema. You will need to do this every time you launch psql.
set search_path to mimiciii;
Here’s what it should look like so far:
Create the tables under the schema
Now run the create tables script. In order to run this script, make a note of where you downloaded the SQL scripts from the postgres folder of mimic-code.
In my case, I downloaded the entire mimic-code repository and extracted the files in C:/Tools/mimic-code-master/. Therefore my path is C:/Tools/mimic-code-master/buildmimic/postgres/, and I ran:
\i C:/Tools/mimic-code-master/buildmimic/postgres/postgres_create_tables.sql
You should see something like the below screenshot.
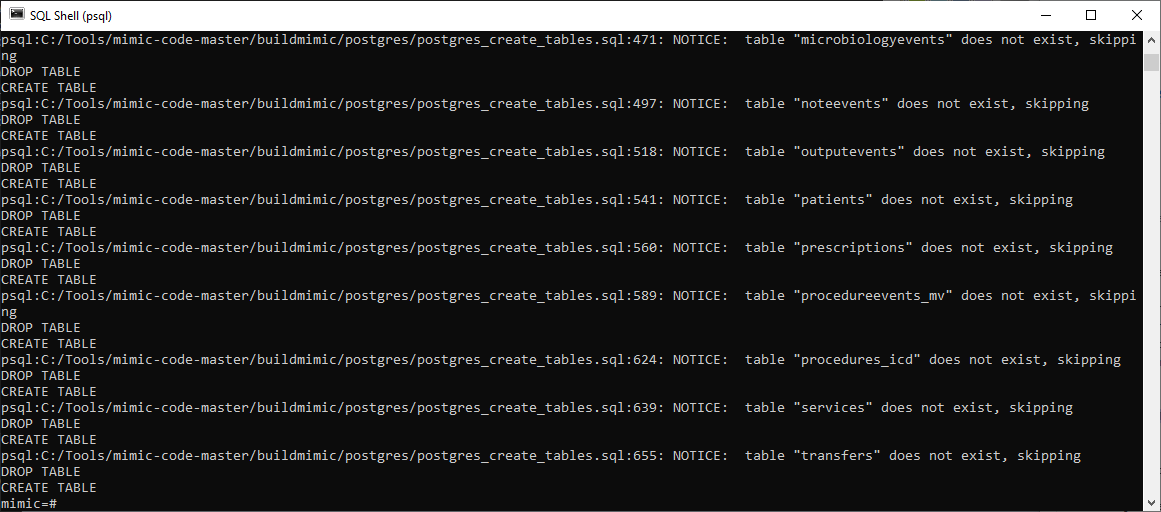
Don’t worry about the “NOTICE: table does not exist” statements - they are normal. The script tries to delete the table before it creates it, and since nothing exists it provides a notice.
Prepare to load the data into the tables
First, let’s prepare to load the data by specifying running a few commands:
\set ON_ERROR_STOP 1
This command tells the script to stop execution upon any error: we’d rather stop at an error so we know that our database has not loaded fully.
\set mimic_data_dir 'C:/mimic-iii-clinical-database-1.4'
This command specifies the folder with the data. In my case, I specified C:/mimic-iii-clinical-database-1.4. This folder contains all the CSV files (compressed or uncompressed) which comprise MIMIC.
Load the data into the tables
Depending on your configuration, you now have three options for loading the data.
- If you have uncompressed data files (i.e. your data folder is full of
.csvfiles), run the basic load script:postgres_load_data.sql - If you have compressed data files, and installed 7-zip, run the 7-zip load script:
postgres_load_data_7zip.sql - If you have compressed data files, and installed gzip, run the gzip load script:
postgres_load_data_gz.sql
So, continuing from above, let’s say that I am using 7zip, and my scripts are located in C:/Tools/mimic-code-master/buildmimic/postgres/. I would run:
\i C:/Tools/mimic-code-master/buildmimic/postgres/postgres_load_data_7zip.sql
You should now see that the row copying process has begun. Be aware that this can take some time, as there are almost 500 million rows in the entire database. Typical loading times are 4-6 hours. Usually the load will appear to pause after printing the following three lines:
COPY 58976
COPY 34499
COPY 7567
This is expected - the fourth table is chartevents, and is by far the largest, and therefore takes the longest to load.
Note also that eventually the fourth line will read COPY 0. This is expected: CHARTEVENTS acts as a “mapping” table to multiple sub-tables, and no data is actually stored within it, so postgres reports that 0 rows were inserted. This is expected behaviour for chartevents, and later on we will run a check to verify all the data has been loaded in. (Note: when querying, do not query subtables chartevents_1, chartevents_2, etc, only query chartevents itself).
Build indexes
After the load finishes, it is recommended to install indexes to improve the speed of queries on the database. These can be installed by running the following:
\i C:/Tools/mimic-code-master/buildmimic/postgres/postgres_add_indexes.sql
While you have the option of building constraints (using postgres_add_constraints.sql) these are mainly used for data integrity checking during the creation of the data. It is not necessary to run this file on your local installation.
Test your build
You should now be able to query MIMIC-III! Try the following simple query:
select
  icustay_id, intime, outtime
from icustays
limit 10;
To verify everything loaded correctly, you can run the check script:
\i C:/Tools/mimic-code-master/buildmimic/postgres/postgres_checks.sql
This should report out PASSED for all tables.
(Optional) Add comments
We have provided a script to add comments to all the tables/columns in MIMIC-III. Run the following to add these comments:
\i C:/Tools/mimic-code-master/buildmimic/postgres/postgres_add_comments.sql
You may also find the introduction to MIMIC-III guide useful. Also, check out the schema.
Good luck in your research!
Feedback
Was this page helpful?
Glad to hear it! Please raise an issue here to tell us how we can improve.
Sorry to hear that. Please raise an issue here to tell us how we can improve.